
These have become quite popular in our little corner of the earth during the past two years. The Automatic Fisherman has been around for a while, and more recently (and what has caused a big stir) the JawJacker was produced. The first contraption is a bit more involved, while the second is as simple as they get. I purchased a JawJacker the beginning of last year's ice season and have been nothing but impressed. It is small, lightweight, adjustable, and very effective if you use the right jig. If you can afford the $37.99 price-tag, the JawJacker is the way to go.
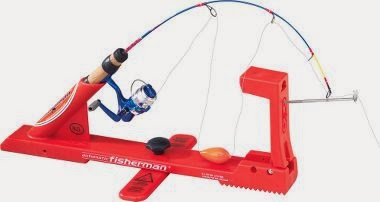 |
| Automatic Fisherman |
 |
| JawJacker |
Is it cheating? I'm undecided on the topic really. Automatic hook setters take away the need to feel the bite and set the hook at just the right time. They can be deadly when a "deadstick" approach is effective, though they do not run a 100% hookup rate. From my experience they get about 50-60%. The times it misses, you simply pick up the rod, drop it back to depth and do things the good old fashioned way.
They are great when you have kids too. You set it up and it's kind of like waiting for Christmas. It pops, you yell "go get it!" and they run over to fight the fish. One of my fishing buddies says he thinks they take all the fun out of it, but I still have a hoot. Part of the reason I still enjoy catching, even with the auto's is that all but one are homemade. I own one JawJacker, and it still beats the homemade ones for size/compactness, but the DIY versions are just as effective. I enjoy making my own fishing gear, and to me using a homemade automatic hook setter is just like catching a fish on a fly I tied.
The first picture is of a fish that came on the JawJacker, but all the rest came from the homemade creations. I'm not trying to deter someone from buying the JawJacker, or Automatic Fisherman for that manner. If you can afford it I would say go the JawJacker route, hands down it is a great product, but if you are strapped for dough you can build one of these DIY deals for $0-$10. Almost all of the supplies I had sitting around the house. As I have made more and more I have tried different designs, but this build is probably my favorite. It's a bit redneck, but if you like to tinker as I do that won't bother you a bit.


Tools:
Drill
Drill bits
Dremel with cutting bit. [Cutting PVC]
Saw (I used a hack saw) [Cutting PVC, Fiberglass Stake, and Wood Base]
Pliers, 2 pairs (one with wire cutter) [Bending Nail and Hanger and Cutting Hanger]
Small Finishing Hammer
Black Sharpie Marker
Supplies:
(3' section) 1 1/2" PVC Pipe (Thick is best)
(1) 1 1/2" PVC T-Coupler
(1) Wire Hanger
(1) 3/8" Fiberglass Fence Stake or 1/2" Wooden Dowel
(1) 2" Finishing Nail
(1) 1" Finishing Nail
Duct Tape (if using a fiberglass stake)
(1) 4" Bolt
(1) Large Washer (that fits the bolt)
(1) Nut (that fits the bolt)
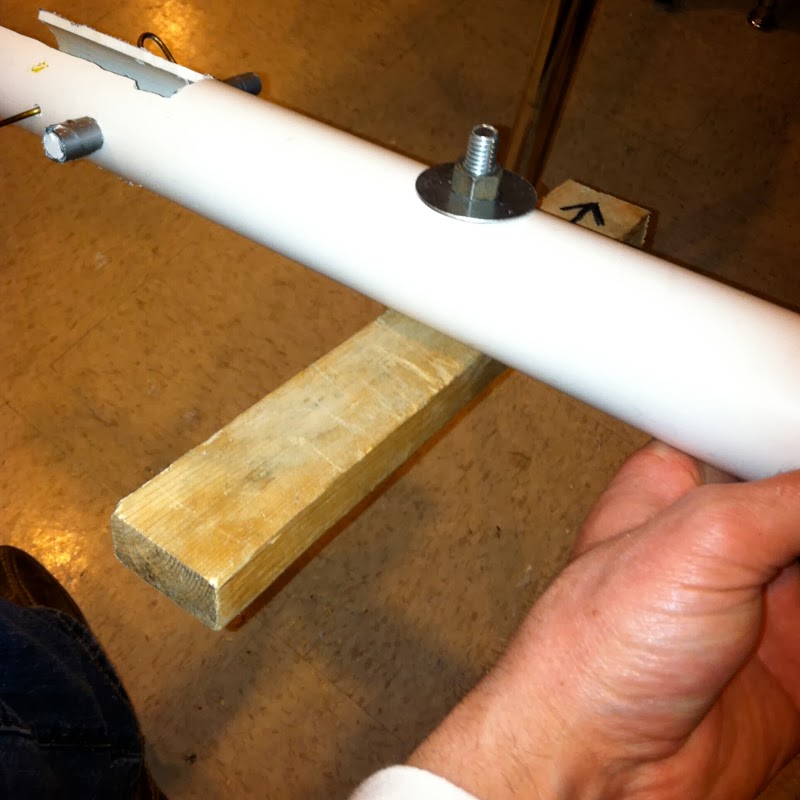
(1) 12" long, 1" thick piece of wood (whatever you have handy)
(1) Spiral Rod holder
(1) 6" section of 20-40lb mono
Instructions:
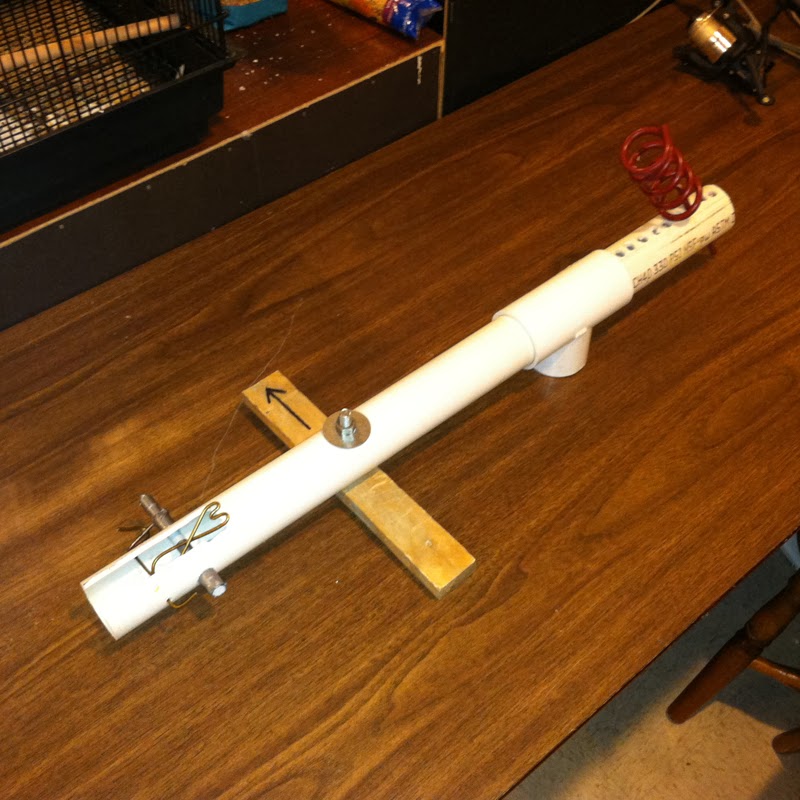
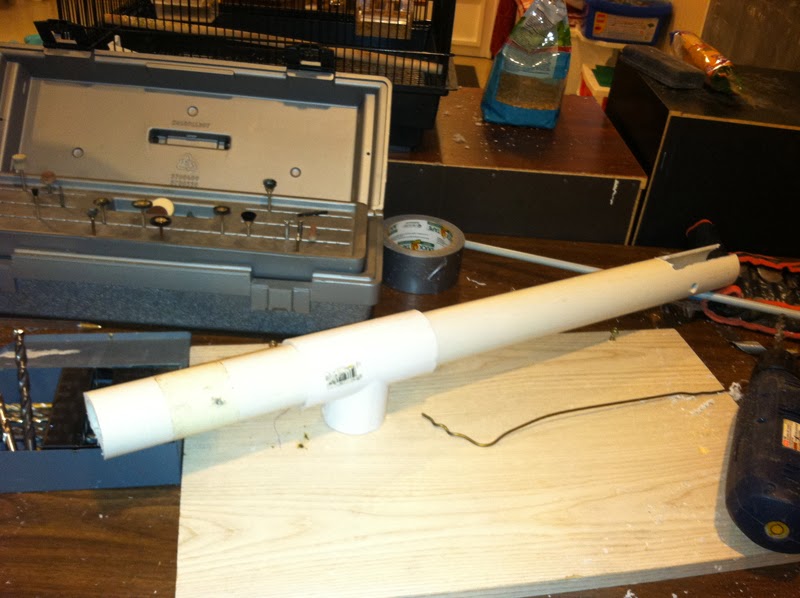
First you start out with your PVC pipe. Cut a 17" section and a 9" section. Insert both of these pieces into your PVC T-Coupler. I didn't glue anything, but you can if you so desire. I just pushed the pieces together as tightly as I could. You should have something that looks similar to the picture, though here you already see one end with cuts, which is actually the next step.
Next you will take a marker or pencil and mark a section on the end of the longer piece and on the top of the PVC pipe. The line should be 1inch wide and 4inches long. Once marked, cut the PVC with whatever tool you prefer. I chose to use a Dremel, with a cutting bit. It wasn't very straight, but I wasn't going for looks with these first builds.
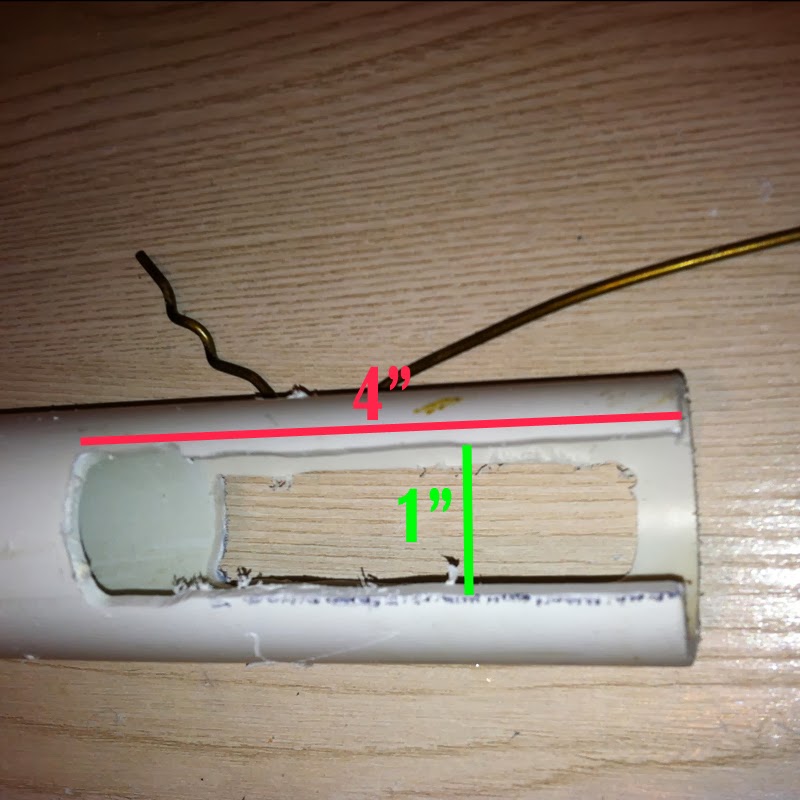
Flip the PVC upside down, then mark a similar section on the bottom, but leave 1/2inch lip. This lip maintains stability and keeps your line catch from dropping right into the water.

After making these two cuts, take your marker and mark a dot roughly 1 1/4" from the inner part of what you just cut. Take a drill bit that matches the diameter of your Fiberglass Stake/Wooden Dowel. In my case the stake was 3/8", so using the same size drill bit I drilled straight through the side of the PVC. Running your drill back and forth will give a bit more freedom for this part of the lever system to turn, but you don't want the hole much bigger than your dowel/stake.


Slide your dowel through to make sure it fits and turns smoothly.
Now take your stake or dowel. Mark a 4inch section off and cut it. If you are using the fiberglass, make sure you put some tape over any place you are going to cut before you cut it. This will keep the fiberglass from splitting and you will maintain the smooth coating. I used Duck Tape, and it worked great.


After placing the dots on the dowel, I placed some more duct tape over the dots I made, and made the dots again. I did this so that the fiberglass wouldn't splinter when I pre-drilled the holes.


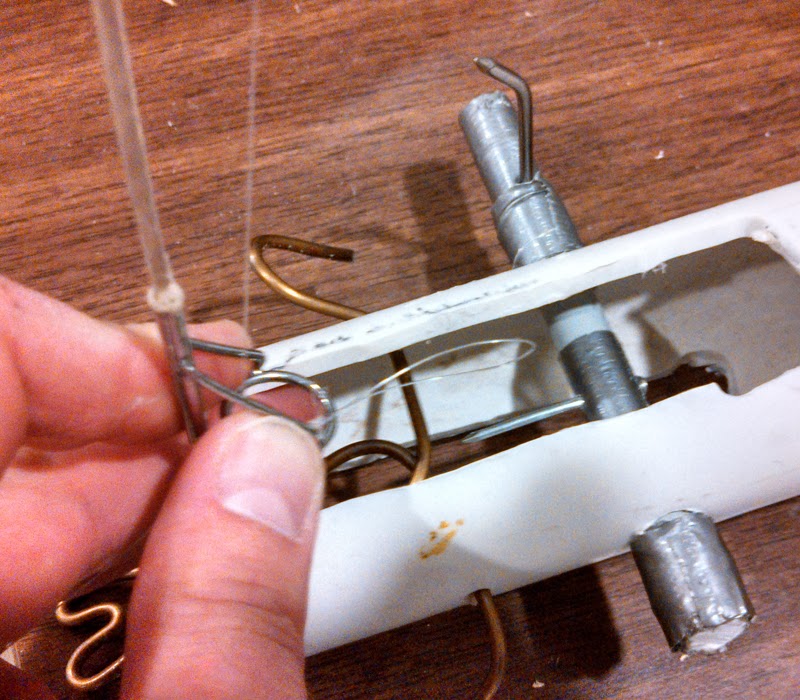
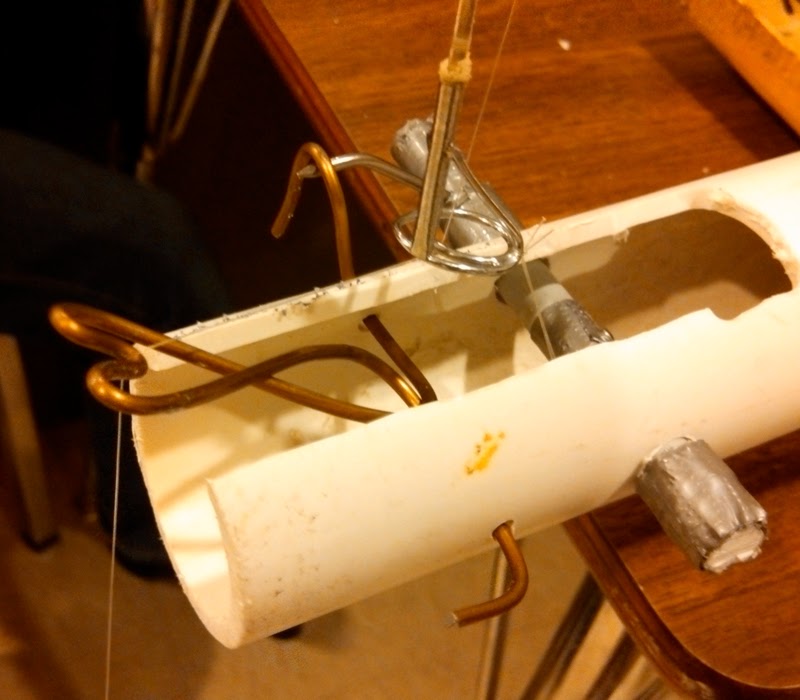
The following is what your end product should look like. To get the nails into place I used a small finishing hammer and hammered the outside 2" nail in first. I then slid the dowel into place and bracing both sides of the dowel I hammered in the 1" nail. Be careful not to break the PVC during this part of the process.
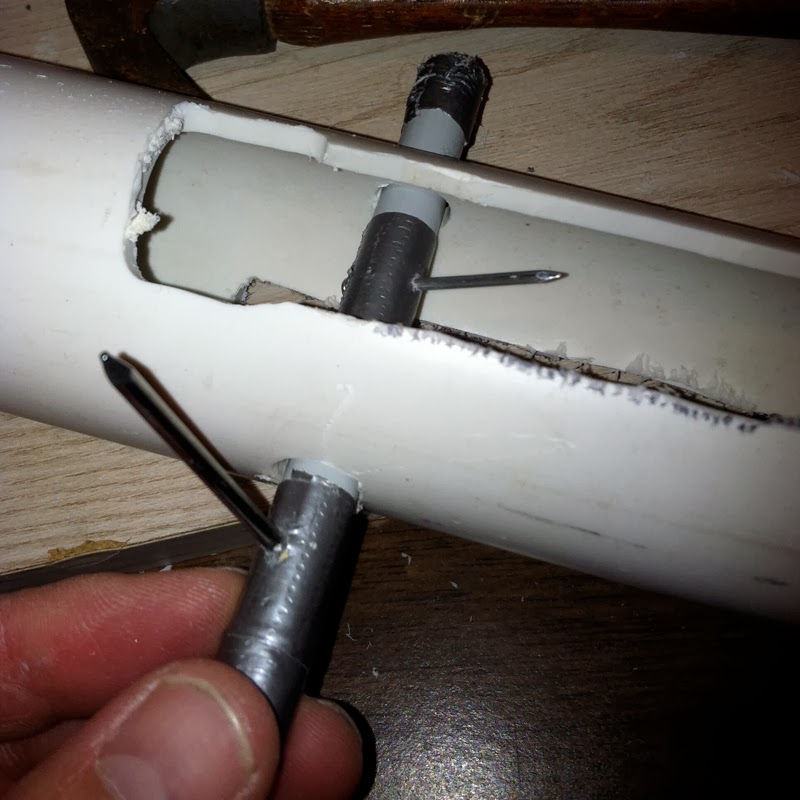

Now take your outside nail and aim it at a 45 degree angle in the direction of the open end of the PVC. Using your pliers (you need two pairs for this part) bend the tip of the nail downward. It should be horizontal when your nail is at a 45 degree angle.
Next take your marker and place a dot directly under the tip section of the nail. Take your drill and a drill bit that is a little bigger than the diameter of your hanger, and drill a hole straight though both sides of the PVC.

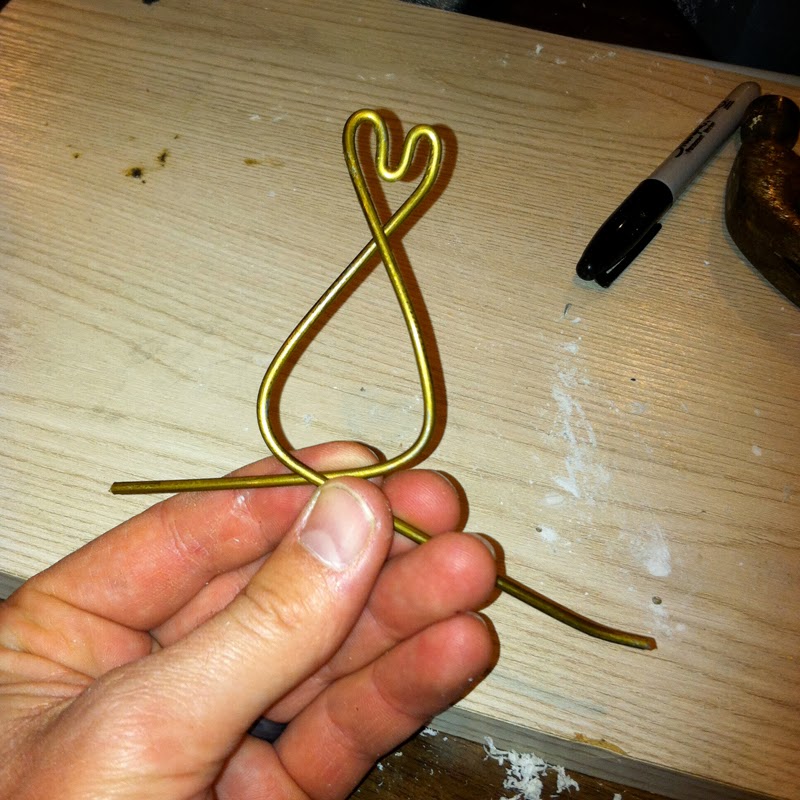
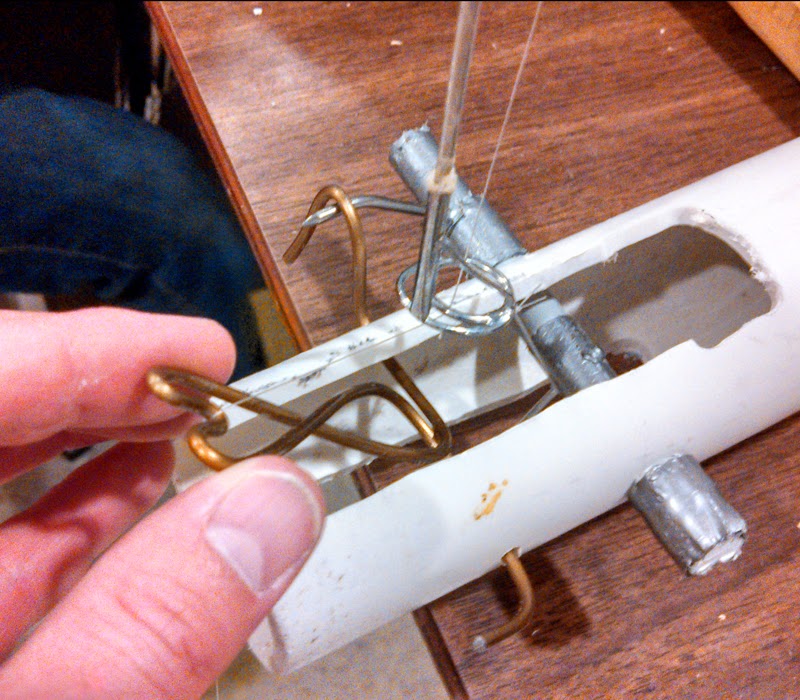
Cut off the long, straight bottom section of your hanger and bend it into a shape that looks something like this. From the bottom middle part (where my thumb is) to the tip part is roughly 3". With the two bottom sections you need one about 2" and the other side should be longer, around 3".
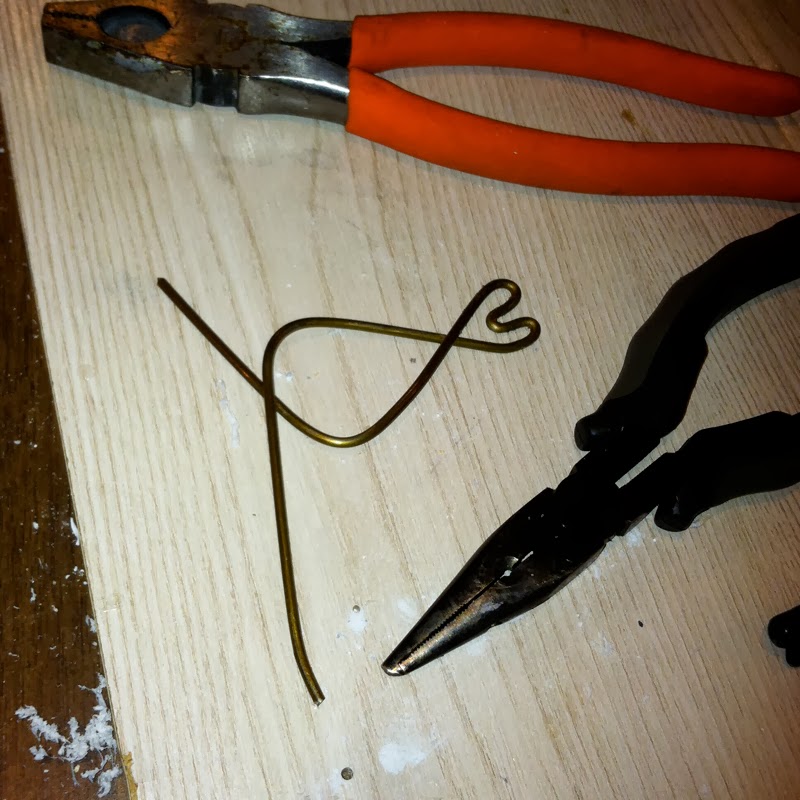

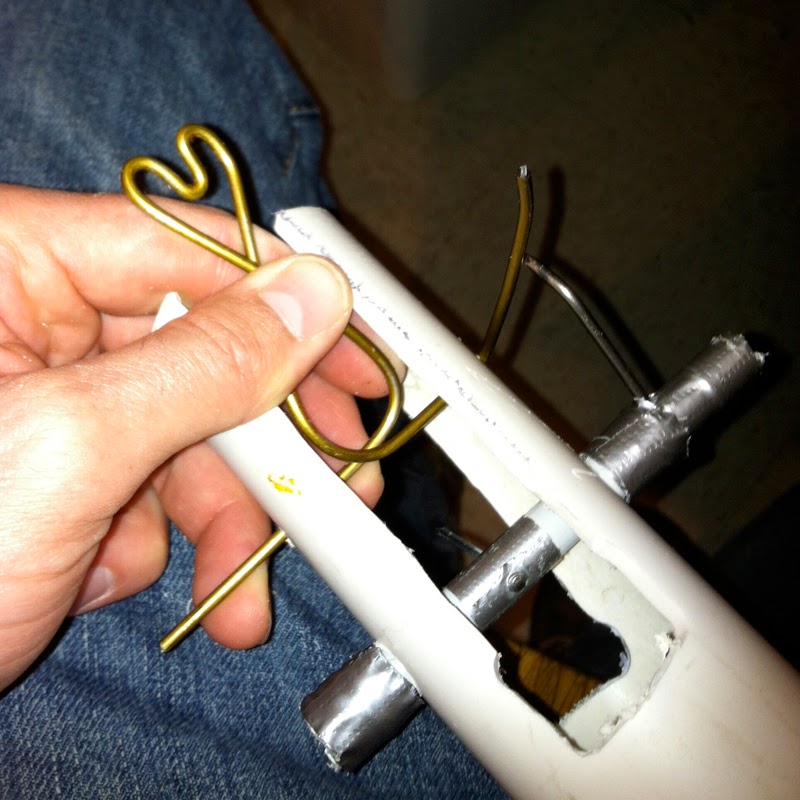
Once you have it in place and feel it moves up and down with ease, aim the line catch "Y" section at a 45 degree angle. While holding the catch there bend the long side straight up. Then bend it over the top of the nail. Then bend the opposite (short) end of hanger the same direction as the line catch "Y" part. You can even trim this short end a bit more if you would like. It is just bent to keep that side of the hanger going back through the hole.


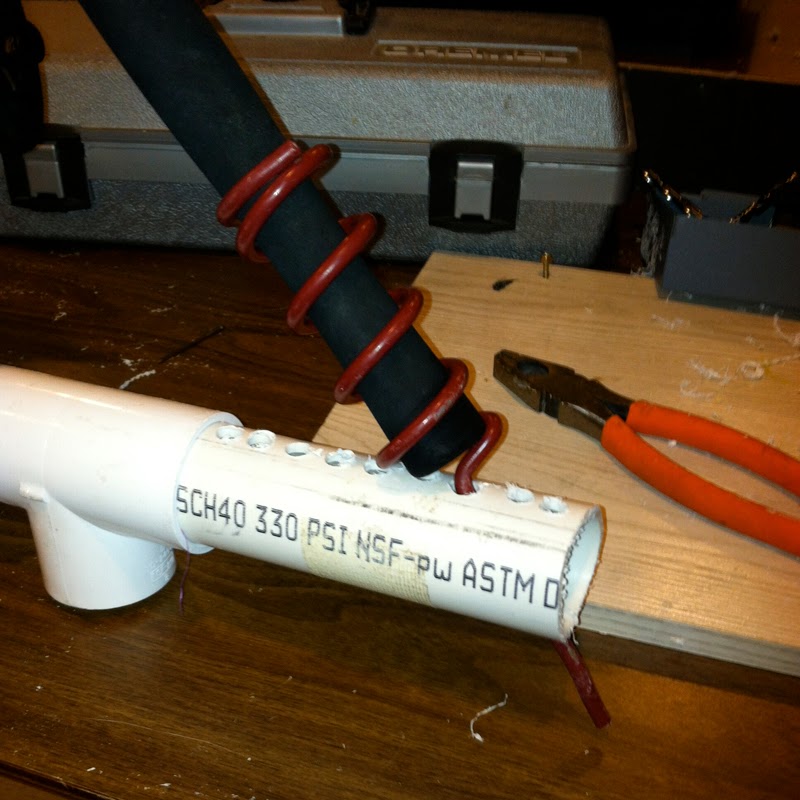
Now, on the back 9" section of PVC (the section on the other end of the T-Coupler) drill a series of holes 1/2" apart. The holes should go all the way through the top and bottom of the pipe. This is where the coiled rod holder goes. You will need to cut the bottom section of the rod holder so it won't push against the ground when in place. Use your own judgement to see where you want it cut. The red colored coiled rod holders cost a couple bucks and the best way to "cut" the bottom part of wire is with a hack saw or to bend it back and forth a bit with a vice. Heavy duty bolt cutters might do the trick too.
You can drill the holes pretty big, this allows you to angle the rod holder however you like and adjust the setup to different poles. The nice part about the T-Coupler is that if you find you need to shorten the front section to fit your particular rods, you can simply pull it off and cut the front section a bit shorter.


The following are pictures demonstrating how to "set" the hook setter.
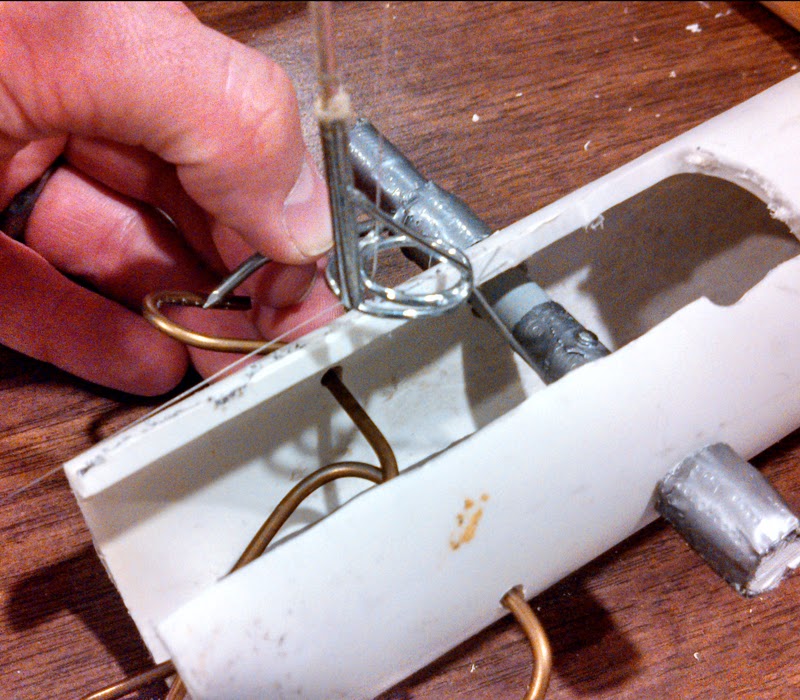
Your line goes from the tip of your rod over the "Y" catch part of the lever. When a fish pulls the line down it pulls the lever off of the 2" nail and allows the dowel to rotate and pole to set the hook.
Be very careful not to put your head above the rod, as it can accidentally go off at any time. It hurts, trust me.
Here is the finished product again, with the rod set and ready to go.
It's a pretty simple thing. If you need to adjust the hanger at anytime to make it more or less sensitive you can. It probably took me an hour to throw together and cost me $0 because all of the supplies were already lying around in my garage. Like I said before, if you have the money, go the nice route and buy a good setup, but if you don't have the moolah, give this DIY build a whirl. Hopefully this was helpful and feel free to share any suggestions or questions.